
In Trinidad and Tobago there are roti wrap and shark and bake stands that provide quick foods like roti, dhal puri, fried bake, and the most popular, Doubles. Roti is a thin flat bread originating from India that is fluffy on the inside and crispy and flaky on the outside. It is cooked on a flat iron plate called a tawah (Hindi tawa) or platain and served with curried chicken, pork or beef. Dahl puri is similar to the roti but is softer and pliable and has crushed dahl lentils cooked with saffron and placed in the centre of the dough before it is rolled out and cooked. This is also served with either curried chicken, pork or beef.
https://en.wikipedia.org/wiki/Regional_street_food
I’m pretty sure this recipe is a first for this blog- the first time I’ve featured a recipe using legumes that isn’t doesn’t wind up as a stew/soup consistency or a pureed dip, like hummus. Yes, I’ve shared some other breads, salads, etc, but they were supporting recipes that didn’t actually contain legumes. (I guess some of my baked bean recipes maybe wound up thicker than stew, but still, the same general category of what you expect beans to be like.)
If you’re a regular reader and follow my method of working through Wikipedia, you were probably expecting a Surinamese dhal recipe today. Well, I had trouble coming up with enough Surinamese dhal recipes to work with to create my own. Most of what came up when I did that search was either labeled as Caribbean style, or attributed more specifically to another Caribbean country, mostly Guyana or Trinidad and Tobago. I only found three or four that claimed to be specifically Surinamese, and they were kind of all over the place with the ingredients. Suriname is right next door to Guyana, and what I came up with was pretty similar to my Guyanese Dhal recipe, except onion was added to the chonkay.
What did come up a lot is dhal puri. Granted most of those recipes were also not specifically Surinamese, and I didn’t discriminate that far searching for recipes, so this is just a Caribbean style dhal puri recipe. Since my real focus right now is yellow split pea recipes from various countries where they are known as dhal, not necessarily dhal the soup, and I did a little looking ahead and found that I was able to see enough dhal (the soup) recipe for the other Caribbean countries left on my list to give them their own entries, so this was a good place to go off track a little bit.
So what exactly is dhal puri? Well, it’s a type of roti, or flat bread, that is stuffed with a ground dhal filling before it is rolled out and cooked. It’s popular in many part of the Indian diaspora, especially the Caribbean and Mauritius. It appears to also be made in India proper, but generally with other types of dal. Searching for dhal puri, (rather than dal), brought up only recipes from the diaspora, using primarily yellow split peas.
Dhal puri is generally served with various curries, although it sounds like it’s a popular side dish to almost any meal, or even just served on its own with a dipping sauce. I even saw a couple posts that said it’s delicious with kheer, which is rice pudding. I’m not sure if I would want it to accompany a sweet dish, but it could work? Most of the recipes I looked at just showed the roti served on the side of whatever curry they were serving it with, but a couple treated it like a wrap, topping it with curry and whatever else they were serving, then folding it over burrito style. I found that it worked best to take ¼-½ of a roti and open it up, pita style, and spoon my curry into the pocket, then fold it over and eat it.
At first glance, this looks like a bit of a production, and it does take several hours, much of it hands off. If you’re a novice at baking and working with dough, this probably isn’t the recipe to start with, but if you have a little experience it actually wasn’t as difficult as I was expecting (I don’t really consider myself a baker, although I seem to have gotten better with a rolling pin recently, so maybe I need to reconsider that stance.)
Probably the hardest part of the whole project is getting your split peas cooked just right. They want to be soft enough to easily mash between your fingers without any grittiness, but still firm enough to hold their shape otherwise, so that when you grind them they make a powder rather than turning to mush. I cooked mine for 30 minutes, and probably should have given then another few; I found a number of hard, unground peas in the mix after I ground it that wouldn’t mash between my fingers. (I think my bag of split peas had quite a few whole peas that hadn’t split for whatever reason- most of the problem pieces I found were whole peas.)
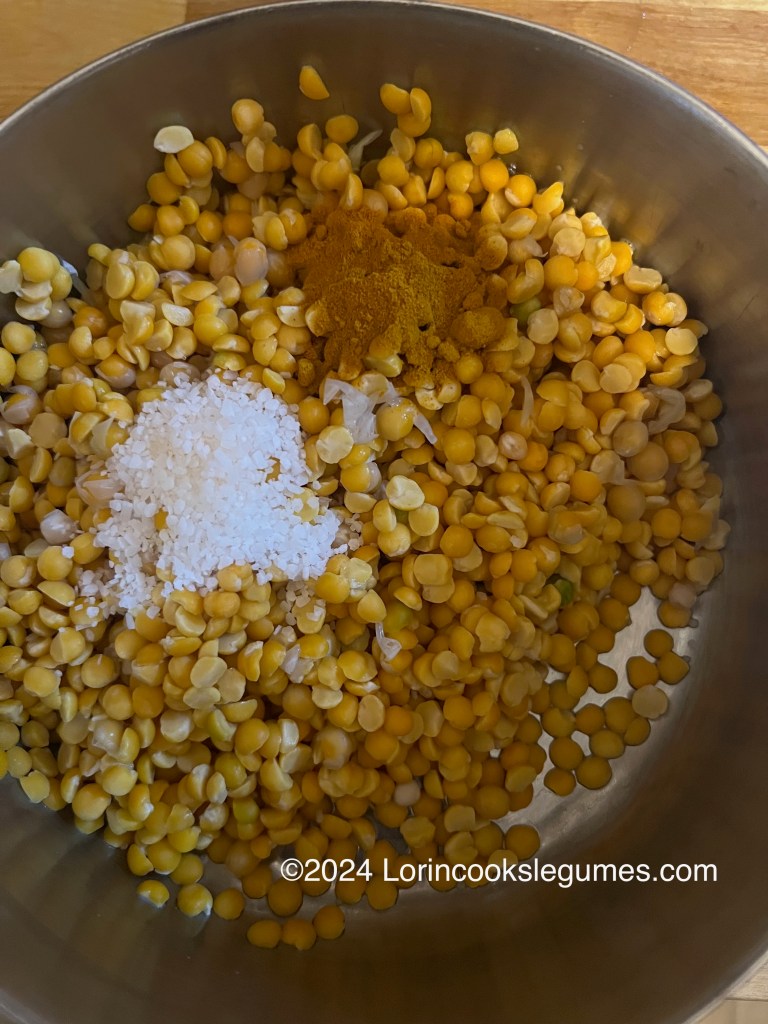
The Wikipedia quote I used at the top of the post says that the peas are cooked with saffron. In researching this recipe I learned (relearned?) that in the vernacular of several Caribbean countries, “saffron” means turmeric. Both provide a nice yellow color to foods cooked with them, but otherwise have nothing in common, and turmeric is definitely the correct spice to use in this recipe.
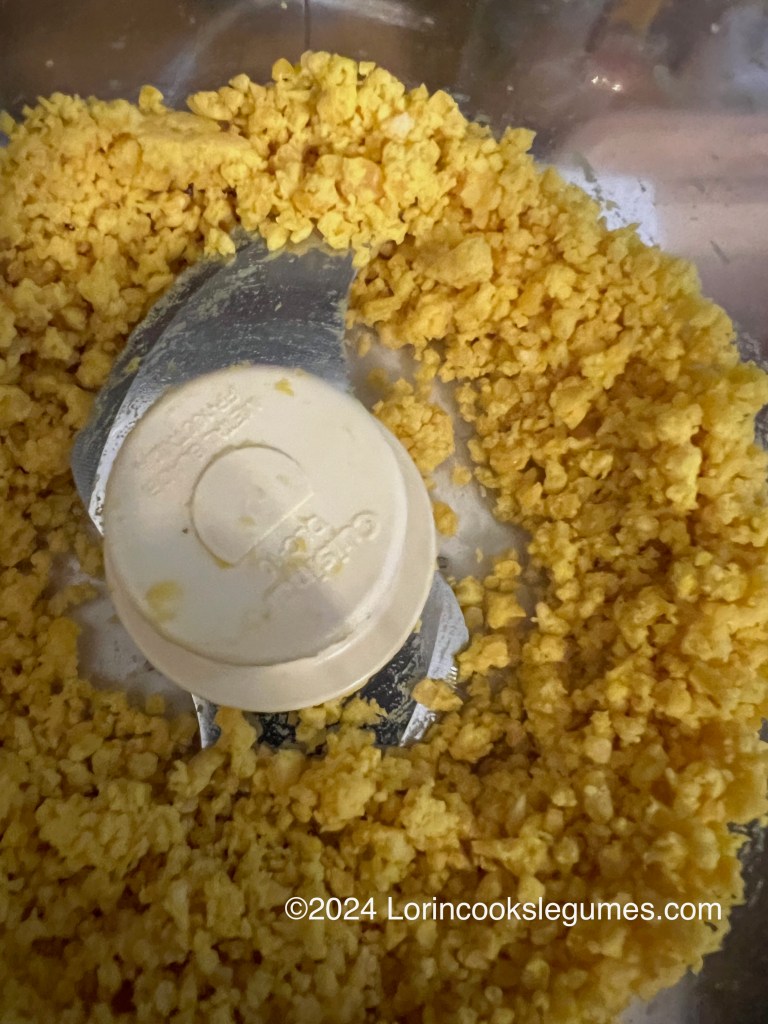
Once the peas are properly cooked, you want to let them cool completely to, again, reduce the chances of them turning to mush. You’ll want to grind them in small batches, for the same reason. I found that 5-10 second bursts was more effective than quick pulses. I added the garlic and hot pepper to the first batch whole, but I think that pulsing them separately first so that they are already minced before adding the peas is probably the right way to do it, and have adjusted my recipe to reflect that. (My first batch got a little mushy, likely because I kept pulsing trying to break down a couple of larger bits of garlic, although I may have also had too many peas in the food processor for one batch as well).
As for what type of hot pepper to use, most recipes didn’t specify. Scotch bonnet or habanero are the most commonly available Caribbean chilies in this country. Wiri wiri was mentioned in at least one. The Surinamese curry recipe I followed to serve with this called for Madame Jeanette chilies, which are apparently a super hot chili common in Suriname. I used habanero. You can use whatever pepper you fancy, or whatever you can find in your local grocery store.
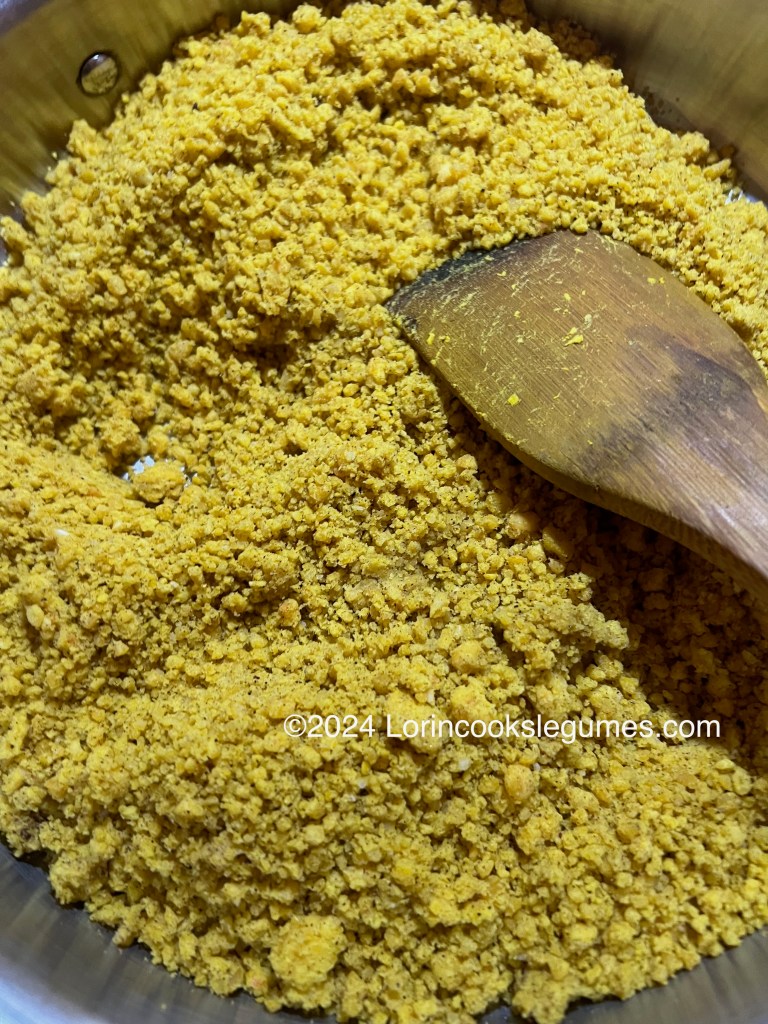
Frying the ground pea mixture is not strictly necessary. I would say most of the recipes I looked at did not do this, but it is a good way to help dry the mixture if it got a little mushy in the grinding process. Do let it cool completely again before filling your roti.
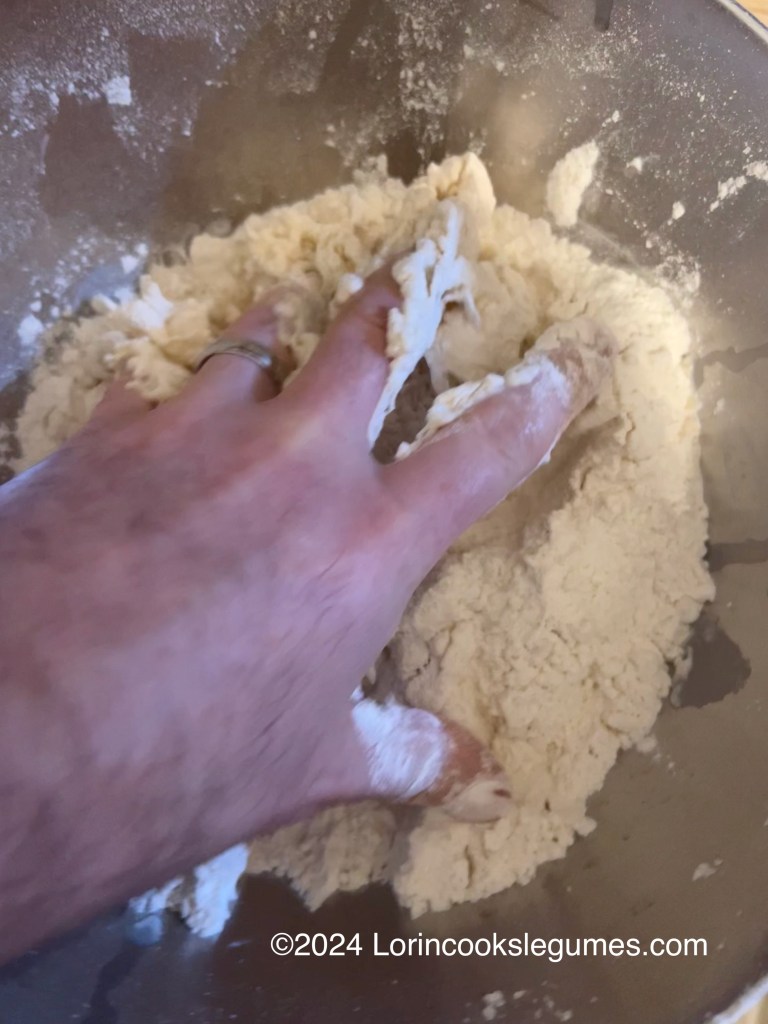
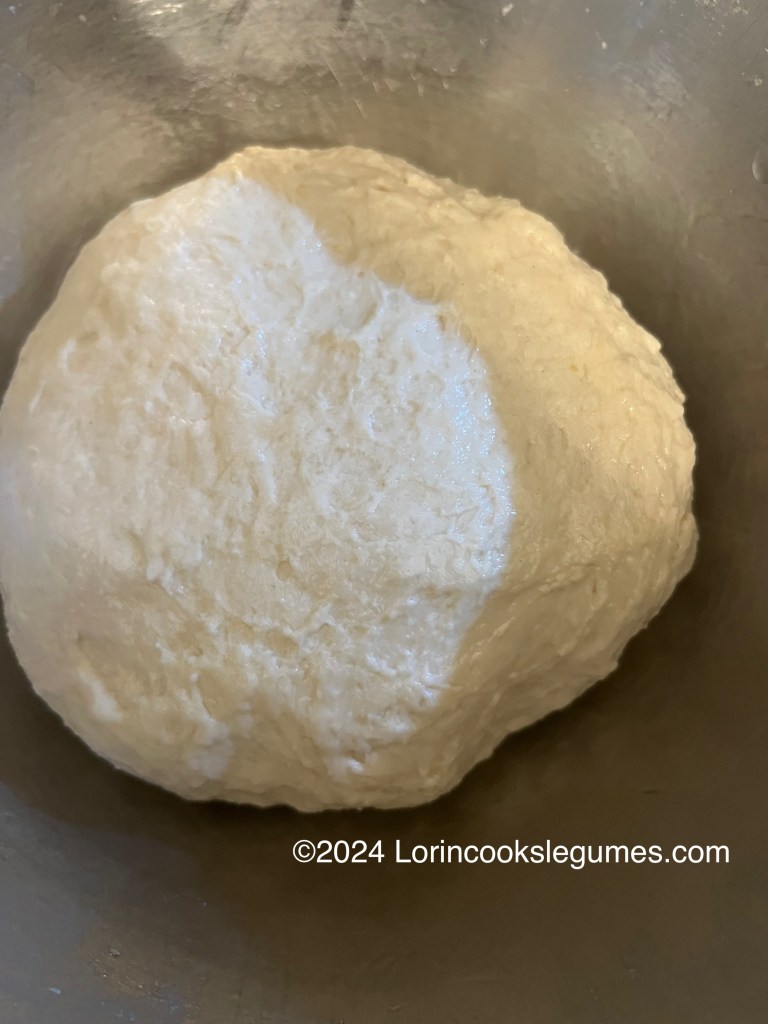
Most of the recipes I looked at recommended mixing the dough with your hand. You’re looking for a soft, fairly sticky dough. I didn’t wind up using quite the full 1 ½ cups of water, more like 1 ¼, and kneaded directly in the bowl, using a “grab and twist” method, until the dough came together into a ball. One trick I did learn from my research was that if the dough seems too sticky, don’t jump straight to adding more flour- first wash the dough off your hand and dry them, then dip your hand if flour and knead again to see if that makes a difference. Because we want a soft, sticky dough adding minimal amounts of flour at this stage is essential, and often the problem is solved by getting sticky dough off of our hands.
On the other hand, once we get to forming and rolling our roti, keeping your work surface well floured is important to keep it from sticking. But first we let the dough rest for about 30 minutes, before dividing it into 8 small balls.
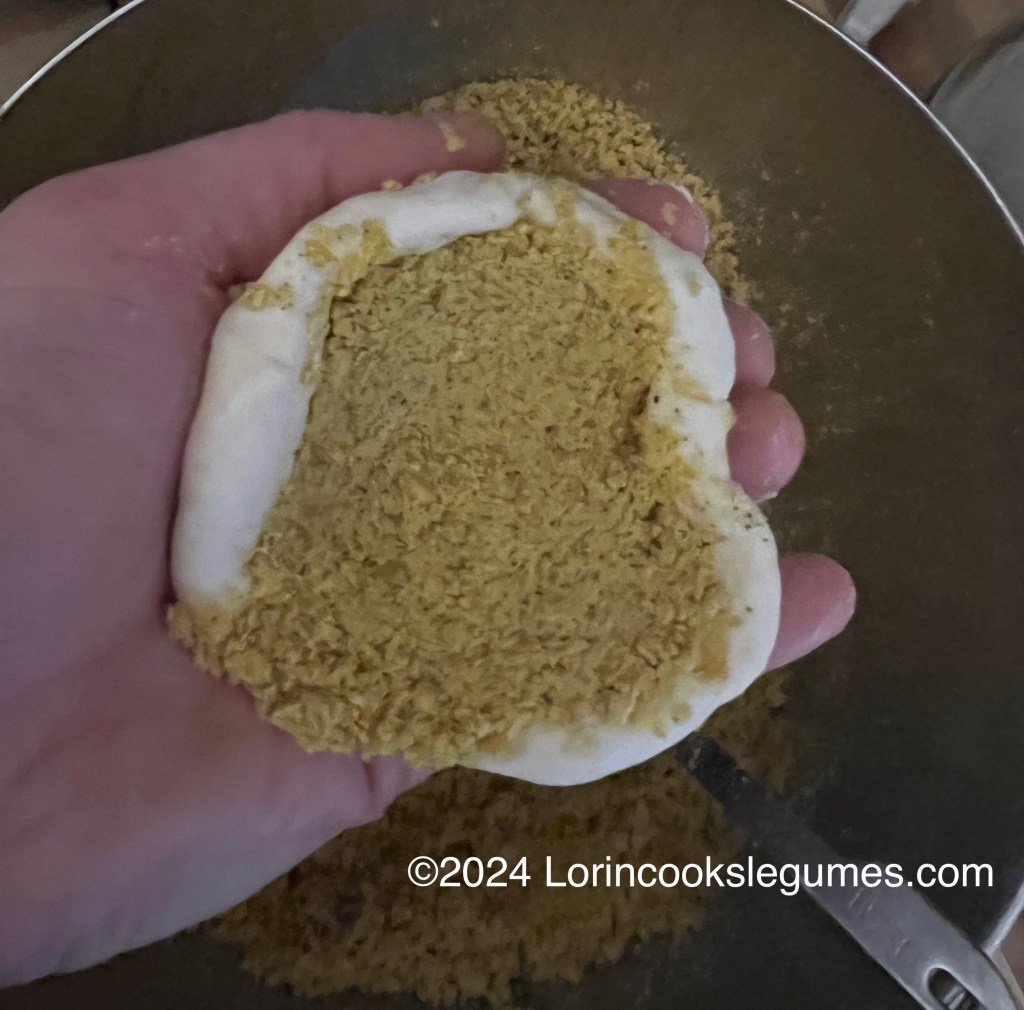
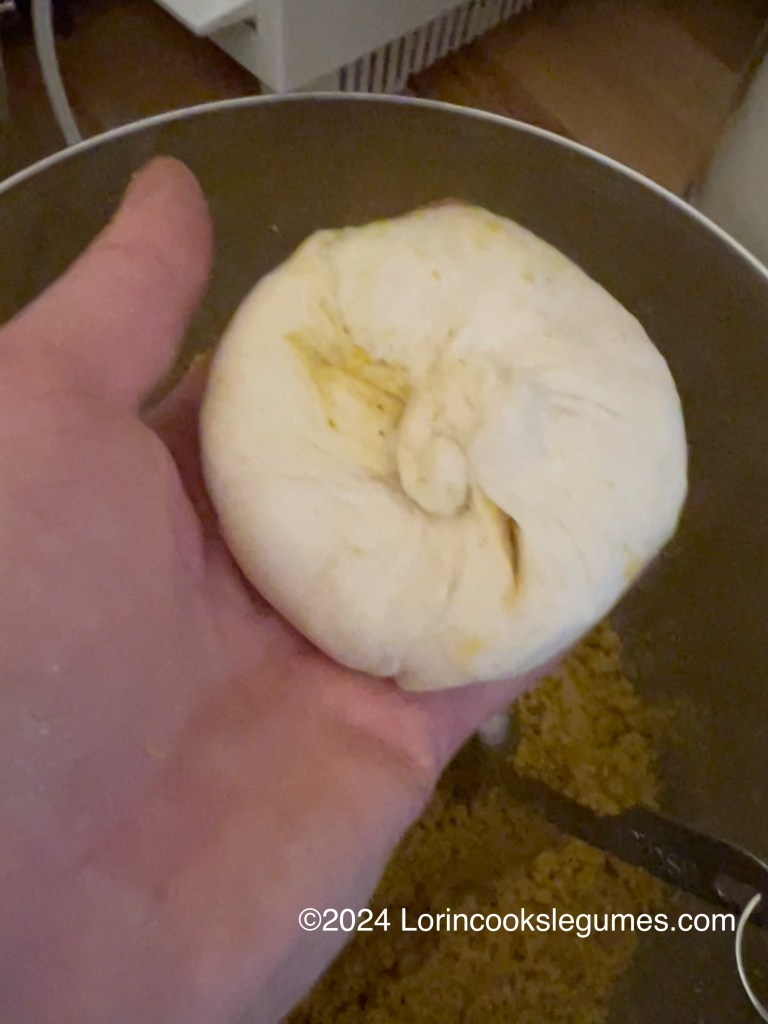
To fill the roti, take a ball of dough and form it into a flat disk about 4 inches in diameter, then into a cup with edges that are thinner than the bottom. Place in your cupped palm and put several spoonfuls of the filling into the center, pressing it in with the spoon. Stretch the dough up over the filling, rotating the roti in your hand, until the edges meet. Pinch them together and give a twist to seal. Work over the bowl of filling to catch any filling that escapes. Dust the seal with a little flour and put seam side down on your counter and flatten into a disk, pushing filling to the edges. Cooking with Ria has a good demonstration of this process in her YouTube video.
You will likely have some filling left over. You can eat this with some rice or add it to your curry. It will keep in the refrigerator for 3-4 days.
Once all your balls are filled, heat your pan over medium high heat. Traditionally this is a tawa , a flat, round, griddle-like pan with no sides. I just used my largest stainless-steel frying pan. Any large, low sided pan or griddle should work, as long as it is heavy enough to heat evenly on high.
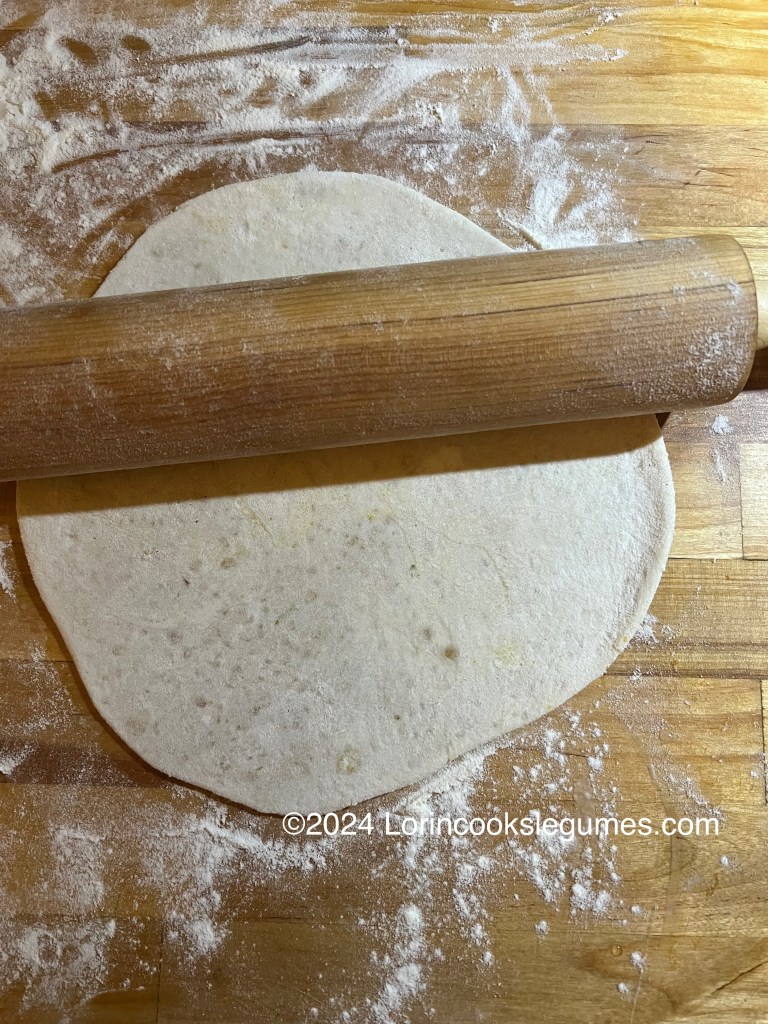
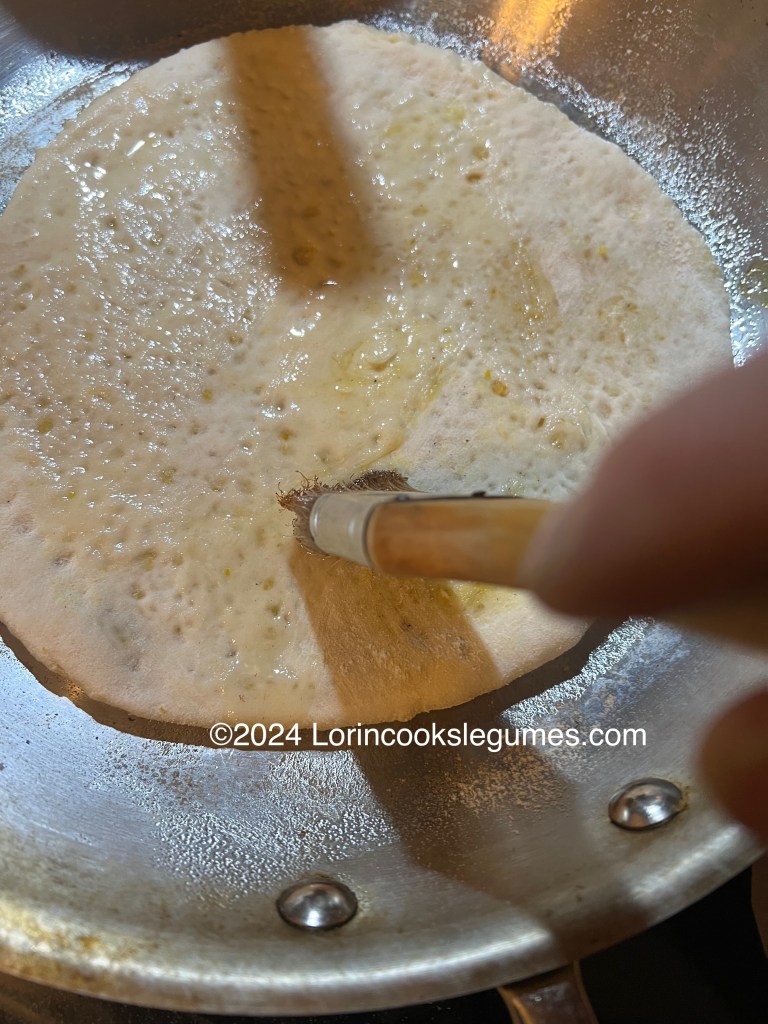
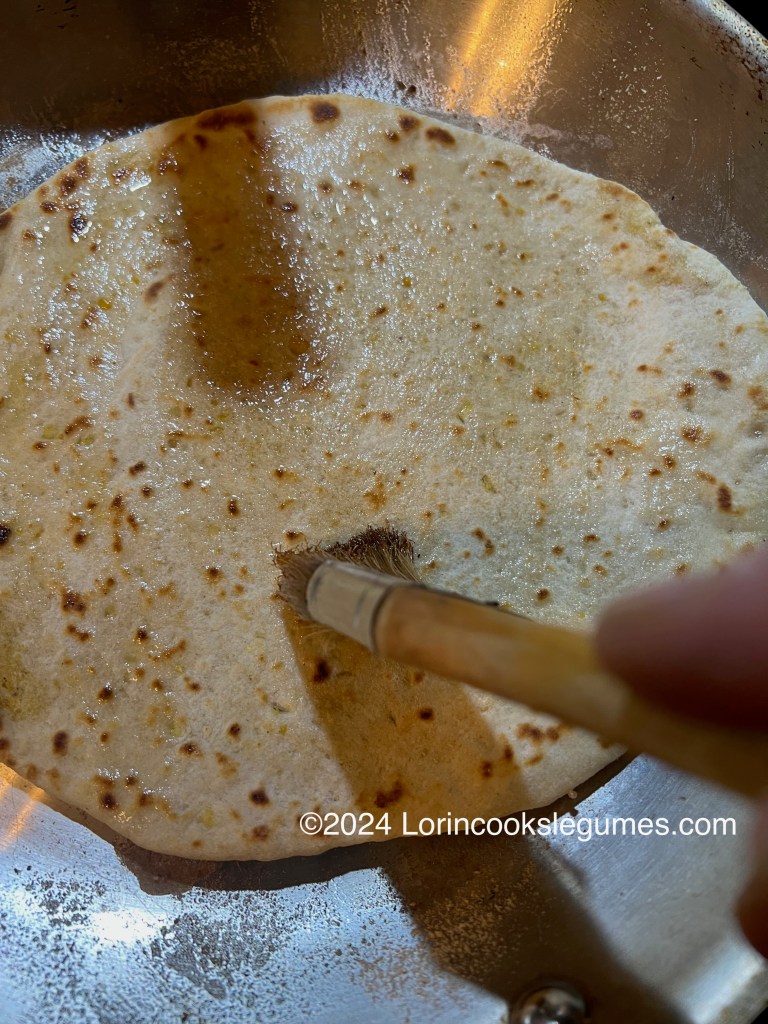
Take a filled ball of dough and use a rolling pin to gently roll it out into a neat circle, as thin as you can make it without the filling breaking through (I believe I was getting mine thinner than ⅛th of an inch). Brush your pan with a little oil and transfer the roti to the pan. Let it cook for about 1 minute, then brush the top with oil and flip it over. Cook for about 30 seconds while you oil the second side, then flip again. Your roti should puff up and be nicely speckled with golden brown spots on both sides. Adjust heat as necessary if it is cooking too fast or too slow. If it puffs fully, you can gently press the edges back to the pan to ensure even cooking across the entire surface- be careful not to deflate the whole thing though.
If your roti does not puff, the most common cause is that your filling broke through the dough somewhere, allowing steam to escape rather than puff up the dough. If you catch this before frying, pinch the hole back together and sprinkle with a little flour, and gently roll it to seal. If your pan is not hot enough your roti may also not puff.
Put the cooked roti in a paper towel lined bowl and cover with a clean towel, so that it can steam while you roll and fry the rest of them. Wipe any residual flour from the pan so that it doesn’t burn, and give it another coat of oil before frying your next roti
If you don’t have a heat proof pastry brush to brush oil on your pan and roti, the traditional method is apparently to dip the bottom of a metal cup in the oil and then rub it across the surface. You can also use the back of a spoon, or a silicon basting brush would be ideal. I was dumb and destroyed one of my pastry brushes that was apparently not heat resistant. Don’t be like me.
These dhal puri are very tasty, and relatively easy to make. My one complaint is that they are very messy to eat- the filling is fairly dry and tends to fall out of the roti as soon you tear into it- keep it over your plate!


Dhal Puri
Yield: 8 roti
Hands on: ~1:20
Hands Off: ~2:00
Total: ~3:20
(As an Amazon Associate I earn from qualifying purchases.)
1 ⅓ cup yellow split peas
5 ⅔ cups water
⅞ teaspoon turmeric
1 ½ teaspoons salt
4 cloves garlic, peeled
⅔ hot pepper
2 teaspoons roasted, ground cumin (geera)
OR
¾ teaspoon roasted cumin seeds
¾ teaspoon salt
2 Tablespoons oil
3 ½ cups flour
3 ¼ teaspoons baking powder
¾ teaspoon salt
¼ cup vegetable oil (divided)
~1 ½ cups warm water (as needed)
¼ cup oil, or as needed (basting)
Optional:
1 Tablespoon melted butter, in the dough
Melted butter as up to half of basting oil
7 leaves culantro, in the filling
1 ⅜ teaspoons brown sugar, in the filling
⅛ teaspoon instant yeast
¾ teaspoon sugar, in dough
Pick over peas and remove any bad peas or foreign objects. Rinse in several changes of water, the cover with cool water and soak 30 minutes to 1 hour. Drain and set aside.
Bring 5 ⅔ cups water to a boil and add the soaked peas, turmeric and 1 ½ teaspoons of salt. Reduce heat and simmer for 20-40 minutes, until peas are just tender. They should still hold their shape, but mash easily between your fingers, with no grittiness. Check frequently and do not over cook. Drain peas in a strainer and spread in a shallow layer on a large plate or baking sheet. Leave to cool completely.
Once peas are cool, place the garlic, hot pepper, and whole cumin seeds (if using) in a food processor and pulse until finely minced, scraping down sides as needed. Add ¼ to ⅓ of the peas and pulse until finely ground, but not mushy. The mixture should look like wet sand. Transfer to a large bowl and grind the remaining peas in the same manner, working in batches to avoid over processing them. Add ground cumin and ¾ teaspoon of salt and use your hands to mix well. As you are mixing, feel for any unground peas in the mixture, and remove them so they do not break through the dough when you roll out your roti.
Heat 2 Tablespoons of oil in a wide pan over medium low heat, and add the ground peas. Cook, stirring constantly, for 5-10 minutes, until the mixture is somewhat dry and crumbly. Set aside to cool.
Meanwhile, place flour, baking powder and ¾ teaspoon salt in a large bowl. Mix well and drizzle with 3 Tablespoons of the vegetable oil. Mix again, then start adding warm water, a little at a time, until a soft dough forms. Knead for about 5 minutes, until dough comes away from sides of bowl and forms a smooth ball. Pour on the remaining 1 Tablespoon of oil and rub all over the dough. Cover with a clean towl and leave to rest for 30 minutes.
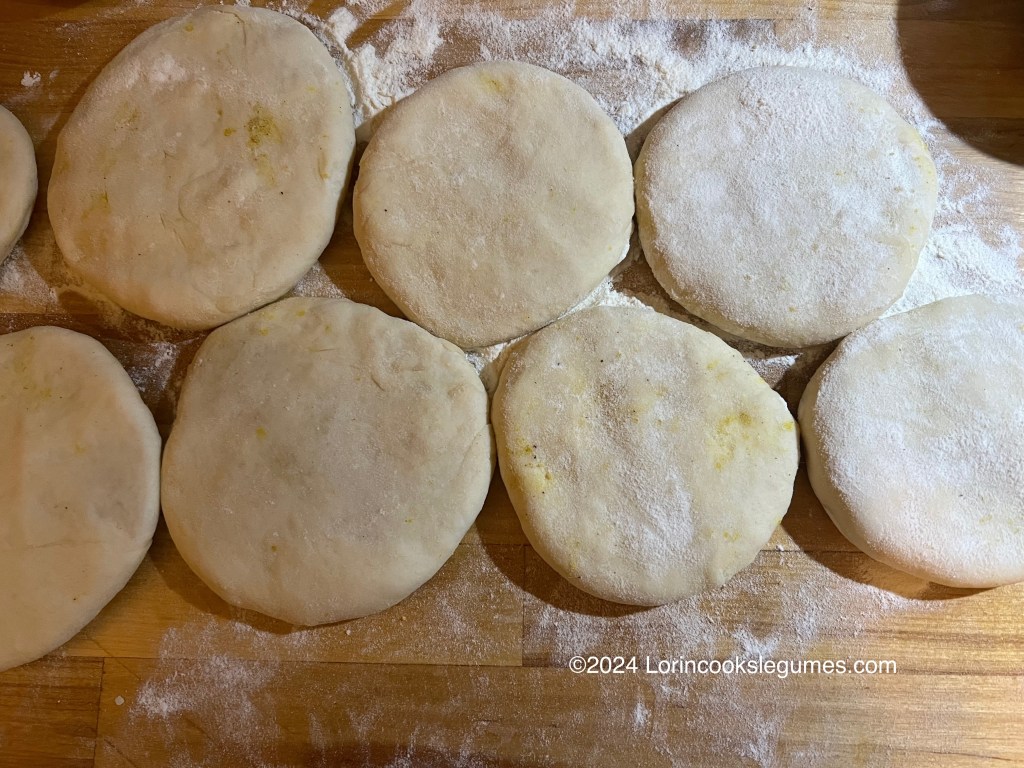
Divide dough into 8 equal parts and form into balls. Place on a well floured surface and cover with a clean cloth. Let rest 5 minutes.
Take a ball of dough and flatten it into a disk. Form into a cup shape with thinner edges and a thicker bottom. Hold in your cupped palm and fill with 3-4 Tablespoons of the pea mixture. Stretch the edges of the dough up and over the filling and pinch to seal. Form and nice neat ball and flatten slightly, pushing filling to the edges. Sprinkle with flour and cover while you fill the remaining balls.
Heat a tawa, griddle or large frying pan over medium high heat. Line a large bowl with paper towls and have a clean cloth handy cover it with.
While it is heating, take a filled ball of dough, place it on a well floured surface, and roll it out into a circle, as thin as you can make it without causing the filling to break through. (or as large as will comfortable fit in your pan). If you prefer to roll all your roti before you start cooking, sprinkle them very generously with flour or separate them with wax paper so they do not stick together, and keep covered with a clean cloth to prevent drying out.
Brush the pan with a little oil. Dust any excess flour off the roti and place on the pan. Cook for about 1 minute, then brush the top with oil and flip. Cook for about 30 seconds, then brush with oil and flip again. The roti should begin to puff up. Gently press the edges against the pan if they lift away. Cook, until speckled with golden brown on both sides, about 2 minutes total. Fold the roti over itself and transfer to the paper towel lined bowl. Keep it covered with a clean cloth while you cook the remaining roti.
Give the pan a quick wipe to remove any burnt flour, and brush with more oil between roti.
Serve with your favorite curry or Caribbean dipping sauce.
